To season your new grill, start by cleaning all components thoroughly with warm soapy water and drying them completely. Apply a high smoke-point oil like refined avocado or canola to the grates and interior surfaces. Heat your grill to 400-500°F with the lid closed for 30-40 minutes until the oil polymerizes into a protective coating. Let it cool naturally to complete the curing process. Different grill materials require specific approaches, and understanding proper maintenance techniques will guarantee your investment delivers consistent performance for years.
Clean the Grill Thoroughly Before Seasoning
Before you can properly season your new grill, you’ll need to strip away factory coatings, residual oils, and protective films that manufacturers apply during production. Start your grill cleaning by removing all grates, heat shields, and removable components. Soak these parts in warm soapy water with a degreasing agent like Dawn to dissolve manufacturing residues. While they’re soaking, scrub the grill’s interior walls and bottom using non-abrasive sponges to eliminate any protective coatings. Don’t overlook burner tubes—wipe them carefully with clean brushes, moving side to side across ports rather than longitudinally. These maintenance tips guarantee proper oil adhesion during seasoning. Rinse all components thoroughly, then dry completely with towels. Any remaining moisture will prevent seasoning oil from bonding correctly to metal surfaces. Protect your hands by wearing gloves during deep cleaning to avoid contact with harsh degreasers and sharp edges. For stainless steel grills, always clean along the grain to maintain the surface’s protective chromium oxide layer. For optimal performance when cooking burgers later, ensure your grill can reach 425 degrees for consistent heating.
Select the Right Oil for Seasoning
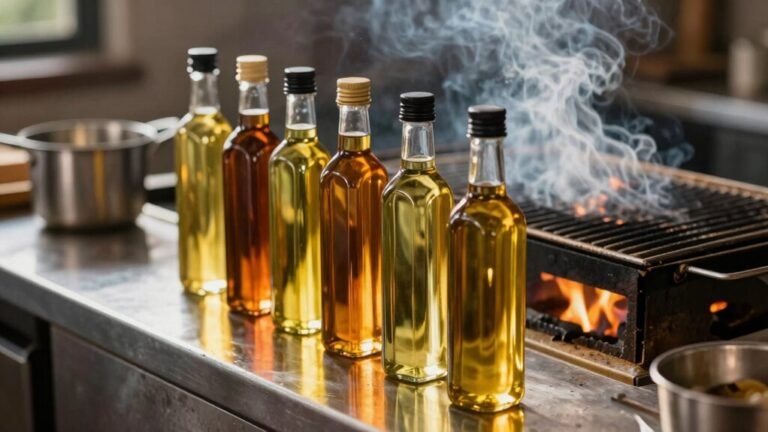
Once you’ve cleaned your grill, choosing the right oil determines whether your seasoning creates a durable, non-stick surface or a sticky mess that burns away during first use. Focus on smoke point first—you need oils rated 400°F or higher to withstand seasoning temperatures without degrading. Refined avocado oil leads at 520°F, followed by refined peanut, canola, and grapeseed oils ranging from 400-465°F. These oil types form stable polymerized layers that resist rust and sticking. Just as vacuum-sealed packaging helps preserve smoked fish, proper oil seasoning creates a protective barrier on your grill’s surface.
Consider flavor impact when selecting your oil. Neutral options like canola or refined avocado won’t transfer unwanted tastes to your food, while strongly flavored oils like extra virgin olive oil can influence future grilling sessions. Stick with refined varieties—they offer superior oxidative stability and consistent performance under extreme heat. Vegetable oil and canola oil remain the most commonly used options for high-temperature grilling applications. After applying oil, allow your grill to burn off residue for 15-30 minutes until the oil starts smoking.
Heat the Grill to a High Temperature
After applying your chosen oil to the grill grates, you’ll need to generate intense heat that transforms the liquid coating into a durable, polymerized surface. Set all burners to high or arrange charcoal evenly, targeting 400–500°F. Close the lid and maintain this temperature for 30–40 minutes—this duration guarantees complete polymerization and burns off manufacturing residues.
The high temperature benefits include creating a hard, non-stick layer that prevents rust and food adhesion. Similar to the reverse sear method used in smoking steaks, this high-heat process helps create an ideal cooking surface. Maintaining proper damper positions helps achieve and sustain the ideal seasoning temperature. However, essential safety precautions are critical: position your grill in a well-ventilated area away from flammable materials, use heat-resistant gloves, and never leave it unattended. Monitor temperature with a built-in gauge or thermometer, avoiding frequent lid openings that disrupt heat consistency. You’ll notice smoke and metal discoloration—both indicate successful seasoning. Once heating is complete, allow the grill to cool down naturally before touching the grates or preparing to cook.
[affiai keyword=”high heat grill thermometer gauge” template=”carousel” count=”3″
Let the Grill Cool Naturally After Seasoning
Your grill has completed its high-temperature seasoning cycle, and now patience becomes your most valuable tool. Resist the temptation to spray water or force rapid cooling—sudden temperature changes cause warping, cracking, and damage to metal components. The seasoning process actually continues during natural cooling as the oil polymer layer cures and hardens. Microscopic pores in the metal close, locking in your baked-on protective barrier. This gradual shift allows the coating to move from liquid to a durable, polymerized sheen that delivers maximum non-stick properties and rust prevention. Just like medium heat grilling produces the best results for corn on the cob, a moderate cooling process yields optimal seasoning results. Similar to how a Tomahawk steak rests for 10-15 minutes after grilling, your seasoned grates need time to properly set.
Beyond these cooling benefits, you’re also avoiding safety hazards. Hot grates remain dangerously hot for extended periods. Once fully cooled to ambient temperature, wipe away any excess residue. The protective barrier keeps moisture away from metal, preventing rust formation. Your grill’s now ready for cooking.
[affiai keyword=”grill seasoning and cooling tools” template=”carousel” count=”3″
Understand Grill Type and Manufacturer Guidelines
Not all grills require the same seasoning approach, and understanding your specific equipment prevents wasted effort or potential damage. Different grill materials demand distinct treatment—cast iron grates need regular seasoning to prevent rust, while porcelain-coated surfaces don’t benefit from oil applications. Weber grills with porcelain enamel coating skip seasoning entirely, whereas Masterbuilt models require pre-seasoning to remove manufacturing chemicals. The seasoning importance varies dramatically: charcoal and gas grills need it for rust protection and non-stick properties, but stainless steel models may not if they’re pre-coated. Always consult your manufacturer’s guidelines before starting. These instructions specify whether your grill needs seasoning, which oils to use, and recommended heat settings. Following these specifications guarantees peak performance and longevity while avoiding unnecessary procedures that could damage protective coatings. Before beginning the seasoning process, clean new grill grates with plain water to eliminate any dust or metal shavings left from manufacturing.
[affiai keyword=”grill seasoning oil for cast iron grates” template=”carousel” count=”3″
Regular Maintenance and Re-Seasoning
Properly seasoning your grill sets the foundation, but maintaining that protective layer determines whether it’ll perform reliably for years or deteriorate within seasons. Establish a maintenance schedule: light cleaning after each use, monthly deep cleans for high-end grills, and professional servicing annually. Watch for re-seasoning indicators—rust spots, excessive food sticking, or flaking surfaces signal compromised protection. Implement preventative measures like covering your grill when idle and using manufacturer-approved cleaners. While many Traeger owners rely on all-natural wood pellets produced in USA facilities for optimal grilling results. Setting up two-zone heating helps prevent temperature fluctuations that can damage your grill’s seasoning. Seasonal inspections matter, especially post-winter storage when weather-related wear becomes evident. Gas grills need quarterly burner checks; charcoal models require biannual deep cleaning. Don’t wait until you’re ready to cook—immediate post-use cleaning prevents grease buildup and maintains your seasoning. If you notice uneven heating, strange smells, or frequent flare-ups, seek immediate professional attention to address potential safety issues. Well-maintained grills last 30% longer, delivering consistent heat and superior flavor every session.