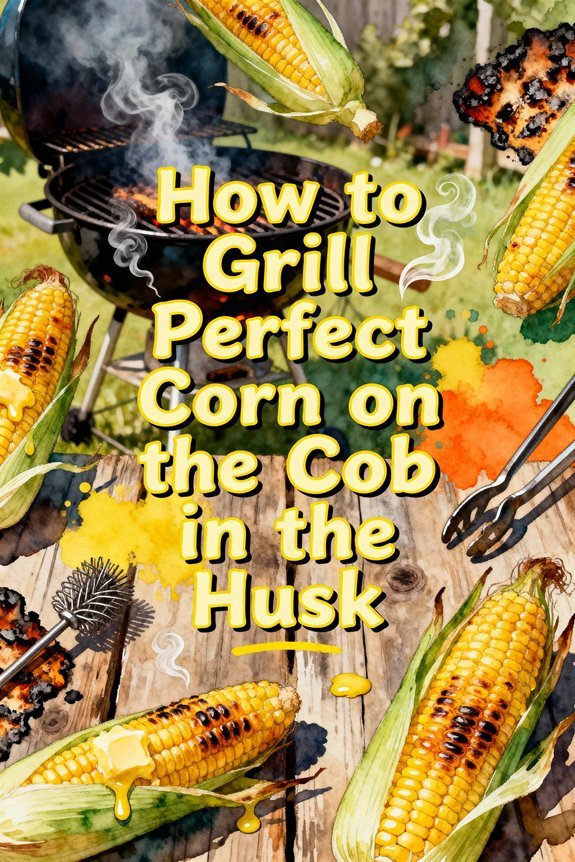
To grill perfect corn in the husk, soak your ears in cold water for 1-2 hours, then shake off excess water. Preheat your grill to medium-high heat (375-450°F) and place corn in a single layer on clean, lightly oiled grates. Grill for 15-30 minutes total, turning every 3-5 minutes until husks are darkened but not burnt. Test doneness by pressing gently – kernels should feel plump and tender. For maximum flavor and the perfect finish, there’s more to uncover about seasoning and serving techniques.
Why Grilling Corn in the Husk Matters
The natural corn husk serves as your secret weapon for achieving perfectly grilled corn on the cob. When you grill corn with the husk intact, you’re creating a natural steam chamber that guarantees ideal moisture retention while protecting those delicate kernels from direct flame exposure. Soaking for 20-30 minutes prevents the husk from burning during grilling.
You’ll notice the difference in both texture and taste. The husk’s protective layer maintains the corn’s natural sweetness while adding subtle smoky notes, delivering superior flavor preservation compared to naked grilling. Your corn will stay tender and juicy, cooking evenly throughout without the risk of charring or drying out. Medium heat grilling ensures consistent results every time. While traditional naked grilling requires frequent turning to prevent burning, the husk method is more forgiving. The result is consistently plump kernels with that coveted al dente bite you’re looking for. Plus, you’ll find the husk makes handling easier and keeps your corn warmer longer after it’s done cooking.
Selecting and Preparing Fresh Corn
Success in grilling corn starts with selecting the right ears at peak freshness. When making your variety selection, look for ears with bright green, moist husks that feel heavy and plump in your hand. Don’t pull back the husks to check the kernels, as this will dry out the corn prematurely. For optimal eating quality, choose supersweet varieties which offer enhanced sweetness and longer shelf life.
For freshness evaluation, examine the silks at the top of the ear – they should be dry and brown, not black or mushy. The corn should feel firm when you squeeze it gently, indicating plump kernels underneath. Like with internal temperature monitoring, checking for proper doneness ensures the best results. Once you’ve chosen your corn, keep it in its husk and store it in the refrigerator until you’re ready to grill. If you need to store it longer than a few hours, place it in a plastic bag to preserve moisture. Similar to smoked sausage, corn will maintain its peak quality for 2-3 weeks when properly stored in the refrigerator.
[affiai keyword=”fresh corn storage bags refrigerator” template=”carousel” count=”3″
The Essential Soaking Process
Before firing up your grill, properly soaking corn is an essential step that guarantees even cooking and prevents burnt husks. You’ll need to partially remove the silk while keeping the husks attached, then submerge your corn in cold water for 1-2 hours for ideal soaking benefits. While some debate exists about soaking effectiveness, longer soak times help prevent excessive charring of the husks. Grilling at optimal temperature of 450-500°F ensures perfectly cooked corn every time.
The soaking method is straightforward: place your prepared corn in a large pot or sink with cold water, ensuring it’s fully submerged. For enhanced flavor, you can add salt or sugar to the water. Similar to grilling frozen chicken, maintaining proper temperature control is crucial for optimal results. Don’t exceed 2 hours of soaking, as it won’t improve results further. The moisture from soaking creates steam inside the husks during grilling, resulting in juicy, tender kernels and preventing the husks from burning. After soaking, gently shake off excess water and carefully wrap the husks back around the corn before grilling.
[affiai keyword=”large pot for soaking corn” template=”carousel” count=”3″
Setting Up Your Grill for Success
Properly setting up your grill creates the foundation for perfectly charred, tender corn on the cob. Start by cleaning your grates thoroughly and applying a light coat of oil to prevent sticking. Using a stainless steel sponge helps remove stubborn residue and ensures better cooking results. Preheat your grill to medium-high heat (375-450°F), ensuring even heat distribution across the cooking surface. Allow your grill 15 minutes minimum to reach the proper cooking temperature before adding corn.
For ideal heat regulation, position your corn in a single layer directly on the grates. If you’re using a charcoal grill, arrange the coals evenly and keep the vents slightly open. For gas or electric grills, close the lid to maintain consistent temperature. Set up a two-zone cooking area when possible—start corn over indirect heat for gentle steaming, then finish over direct heat for those desirable grill marks. Remember to leave enough space between ears for proper air circulation and easy turning. Soaking your corn in water for 30-60 minutes before grilling ensures optimal tenderness and prevents burning.
Step-by-Step Grilling Method
Once you’ve prepared your corn and heated the grill, follow these essential steps to achieve perfectly grilled corn on the cob.
Soaking corn for 10 minutes in cold water before grilling helps prevent burning and ensures moisture retention. Place your corn directly on clean grill grates at medium heat (300-450°F), utilizing the husk benefits as a natural steam wrapper. Like temperature control in smoking ribs, maintaining consistent heat is crucial for perfectly cooked corn. Keep the lid closed and grill for 15 minutes using indirect heat, turning every 4-5 minutes for even cooking. The protective husks will prevent the kernels from drying out while infusing them with smoky flavor. Similar to dark brown marks on grilled sweet potatoes, these grill marks indicate proper caramelization and enhanced flavor development.
Finish by moving the corn over direct heat for 3-5 minutes to add light char. Don’t worry if the husks blacken – this is part of the grill technique. Test doneness by piercing a kernel with a skewer; it should feel tender. Let the corn cool briefly before peeling back the husks and serving.
[affiai keyword=”grill tools for corn on the cob” template=”carousel” count=”3″
Timing and Temperature Guide
To achieve perfectly grilled corn, mastering temperature control and timing is essential. Set your grill to medium or medium-high heat, maintaining a temperature between 350°F and 450°F. You’ll want to create both direct and indirect heat zones for best results. Before grilling, make sure your grates are clean and debris-free to prevent unwanted flavors from transferring to your corn. For enhanced flavor, consider brushing corn with garlic butter mixture before grilling.
Your timing techniques should focus on a total cook time of 15-30 minutes, rotating the corn every 3-5 minutes for even cooking. Watch for visual cues: the husks should darken and begin to peel back naturally, but shouldn’t burn excessively. Test for doneness by gently pressing the kernels through the husk – they should feel plump, not hard. For consistent temperature control, avoid overcrowding the grill and adjust your heat settings as needed. Remember that the corn will continue steaming inside the husk after you remove it from the grill. Before placing corn on the grill, ensure you’ve soaked in water for optimal moisture retention.
Perfect Seasoning and Serving Tips
Mastering the art of seasoning grilled corn elevates this summer favorite from good to spectacular. For perfect flavor, start with a light brush of olive oil or melted butter before adding your chosen seasonings. You’ll find endless seasoning variations, from classic salt and pepper to zesty Mexican-style with chili powder and cotija cheese. Grilling at a medium-hot temperature ensures optimal caramelization and flavor development.
Create compound herb butter using fresh parsley, cilantro, or thyme for an aromatic touch, or spice things up with a chipotle-brown sugar blend for sweet heat. Apply your seasonings while the corn’s still hot, and serve immediately with extra toppings like lime wedges and fresh herbs. Don’t forget to let your guests customize their corn with additional butter or seasoned salt at the table. For best results, always start with fresh corn and avoid overcooking to maintain that perfect tender-crisp texture.
Expert Tips for Maximum Flavor
Grilling experts know that achieving maximum flavor starts with proper corn preparation and precise heat control. You’ll want to thoroughly remove silk and trim loose husks before soaking your corn for at least 20 minutes. This hydration step is essential for creating the perfect steaming environment that enhances kernel sweetness during cooking. Direct grilling methods work best for achieving a rich, smoky taste. The end result delivers bright yellow kernels and an appetizing charred exterior. Similar to wood chip smoking, this technique infuses deep flavors into your food.
Maintain your grill at 375°F to 450°F and cook the corn undisturbed for 10 minutes before flipping. The husks will char, developing that coveted smoky flavor while protecting the kernels inside. Let the corn cook for another 10-12 minutes, then remove it from heat. After a brief cooling period, shuck the corn and immediately add your favorite toppings – the warm kernels will readily absorb butter and seasonings, maximizing flavor impact.
Pairing and Serving Suggestions
While grilled corn on the cob shines as a standalone summer favorite, it reaches new heights when thoughtfully paired with complementary dishes. Classic pairing options include grilled meats like honey BBQ chicken, steak, or smoky sausages that enhance corn’s natural sweetness. For lighter fare, try Cajun honey butter salmon or grilled paprika tilapia. Peak ripeness allows for minimal seasoning while still delivering maximum flavor. Similar to how tender brisket requires precise temperature control, grilled corn needs careful timing to achieve the perfect texture. Just as cast iron skillets create the most even heating for grilled sandwiches, they also work beautifully for charring corn kernels removed from the cob.
Transform your corn into an interactive experience with creative serving ideas. Set up a toppings bar featuring butter, cheeses, spices, and fresh herbs, or create an elote station with Mexican-inspired ingredients. For easy handling, use corn holders or tie back the husks as natural handles. Present your corn on colorful platters for family-style serving, or wrap individual portions in foil for casual outdoor dining.
[affiai keyword=”corn on the cob holders serving set” template=”carousel” count=”3″