Let your Weber grill cool completely for 1-2 hours, then remove and soak the grates in a baking soda-vinegar paste. Clean the flavorizer bars and heat deflectors with warm, soapy water, scrub the interior with a stainless steel brush, and clear any blockages from the burner tubes. Wipe down exterior surfaces with a degreaser, empty the grease tray, and replace drip pan liners. Reassemble all components, checking that fasteners are tight and gas connections are secure. The following steps break down each component’s maintenance requirements in detail.
Gather Your Cleaning Tools and Prepare Your Workspace
Grill maintenance success starts with proper tool selection and workspace organization. You’ll need a firm-bristled grill brush, scrapers matched to your grill surfaces, and scour pads—but avoid abrasive stones on Weber’s “Ready, Not Rusty” griddles. Include dishwasher-safe cleaning handles for better grip and easier maintenance. For cleaning solutions, select a grill-specific degreaser spray, exterior grill cleaner, and cooktop cleaners suitable for Weber surfaces. Using natural cleaning solutions like vinegar and baking soda can effectively remove tough grease while protecting stainless steel surfaces. Avoid abrasive chemicals that damage protective coatings. Regular post-grilling cleaning helps prevent stubborn buildup and extends the life of your grates.
Your workspace setup requires outdoor or well-ventilated areas to prevent fume inhalation. Use a stable work surface, wear protective gloves, and keep durable trash bags nearby for grease disposal. Arrange cleaning tools systematically—brush, scraper, degreaser, rinse cloths—and prepare drip pans, microfiber towels, and a soaking basin for heavily soiled parts. Consider a six-piece griddle cleaning kit that includes easy grip handles, scour pads, and cleaning stones for comprehensive griddle maintenance.
Allow Your Weber Grill to Cool Completely
Safety demands your patience—attempting to clean a hot Weber grill risks serious burns, damaged cleaning tools, and compromised grill components. Allow 1-2 hours for complete cooling, longer for charcoal models or extended cooking sessions. Regular maintenance tips help prevent buildup that makes cleaning more difficult later. Proper cooling techniques include closing the lid and all vents to contain heat safely while preventing rapid temperature changes that could warp metal surfaces.
Essential safety precautions require keeping children and pets away during cooling. Use an infrared thermometer or hand-distance test to confirm safe handling temperatures before proceeding. Never spray water or force cooling—this damages grill parts and protective coatings. For optimal cleaning results, aim for a grate temperature of around 400°F during your next pre-cleaning heating session.
Once cool, solidified grease removes more easily, and cleaning solvents work effectively without evaporating. Disconnect propane tanks only after complete cooling to prevent hazards. If you plan to clean the grates, consider doing so before your next grilling session by preheating on high for 10-15 minutes to cook off remnants.
Remove and Soak the Grill Grates
Proper grate removal sets the foundation for thorough cleaning and extends your Weber grill’s lifespan. Once cooled, lift the grates from your grill and assess their condition. Different grate materials require specific approaches—stainless steel tolerates general cleaners, while porcelain-coated grates need gentler solutions to preserve their finish. Cast iron demands careful handling to maintain seasoning. For an eco-friendly approach, create a baking soda paste with vinegar to tackle stubborn grease naturally.
Select appropriate cleaning solutions based on your grate type. Weber Grate Grill Cleaner works across various materials, while alternatives include Easy Off, Bar Keeper Friend, or Citrus Safe products. Place grates in a large plastic bag, add your chosen cleaner, seal tightly, and let soak for several hours. This method loosens baked-on residue effectively. Just as a brisket needs low and slow cooking for the best results, your grates benefit from extended soaking time to break down tough residue.
Gather essential tools: grill brush, scrubbing pads, and rags for post-soak cleaning.


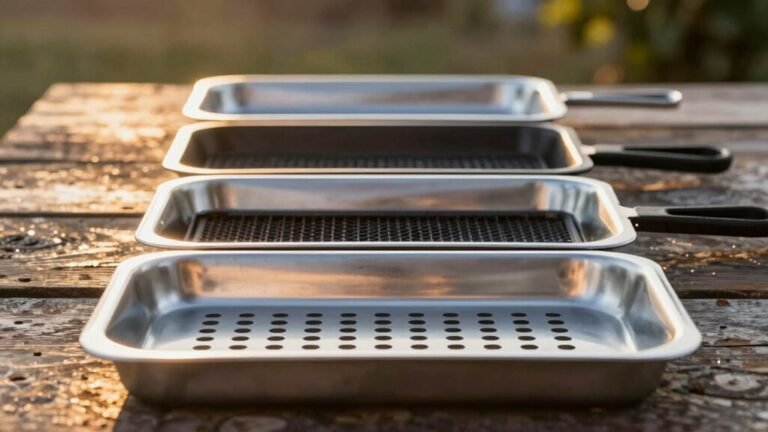
Clean the Flavorizer Bars and Heat Deflectors
Once you’ve removed the cooking grates, you’ll find the Flavorizer bars—those angled metal shields positioned directly above your burners. Lift them out carefully after they’ve cooled completely. Heat deflector cleaning begins with brushing off loose debris while components are still warm, then scraping stubborn buildup with a plastic putty knife to protect enameled surfaces. For heavy accumulation, soak bars in warm, soapy water and scrub with a non-abrasive pad. Apply a baking soda paste for persistent grease, then rinse thoroughly and towel dry immediately to prevent rust. Clean these components every fourth grill session during heavy use. Regular inspection identifies when Flavorizer repairs become necessary—look for warping, holes, or excessive corrosion that compromises heat distribution and flavor development. These bars vaporize drippings to enhance the smoky taste of your grilled food. For optimal safety and effectiveness, always ensure the propane tank is disconnected before conducting a thorough cleaning of your grill components. Similar to charcoal residue, any accumulated debris should be completely removed to maintain proper heat distribution and prevent flare-ups.
Scrub the Interior and Remove Ash Buildup
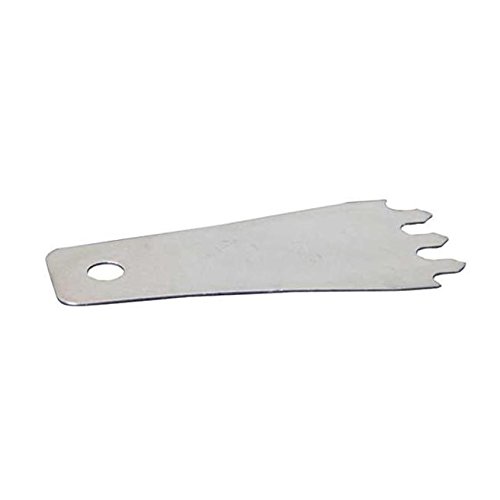
With the Flavorizer bars and heat deflectors set aside, you’ll now access the grill’s interior surfaces where grease, carbon deposits, and ash accumulate. Use a stainless steel grill brush to scrape carbonized buildup, working back-and-forth along the metal grain. For stubborn, lacquered deposits, employ a single-sided razor blade scraper—it cuts through thick residue without damaging enamel. Apply Weber Grate Grill Cleaner or soapy water, letting it sit 30–60 seconds to loosen grime. Scrub with steel wool for tough spots. These scrubbing techniques effectively restore interior surfaces. Maintaining a clean grill is essential for achieving proper smoke flavor when cooking dishes like butterflied chicken. Using natural degreaser solutions helps break down tough grease without harsh chemicals.
For ash disposal, scoop out loose particles with a scraper or brush, pushing debris into the removable grease tray. Empty the tray multiple times if needed. Wipe all surfaces with a damp cloth to collect remaining dust before reassembly. Regularly remove deposits of grease and smoke buildup to maintain optimal grill performance.
[affiai keyword=”grill interior cleaning tools brush scraper” template=”carousel” count=”3″
Clear and Inspect the Burner Tubes
After completing the interior scrubbing, you’ll address the burner tubes—critical components that distribute gas evenly across your grill’s cooking surface. Begin your burner tube inspection by verifying the grill is cool and the gas supply is shut off. Remove cooking grates and flavorizer bars to access the tubes. Use a light source to identify blockages, debris, or scaling inside each tube. Warm soapy water works effectively for loosening stubborn grease and debris before scrubbing. Regular maintenance with mild detergents helps prevent severe buildup of grime over time.
Clean the burner ports with a stainless steel grill brush, working in an up-and-down motion—never side-to-side, as this pushes debris deeper. Address each tube individually, scrubbing all ports thoroughly for ideal gas flow maintenance. For stubborn debris in smaller holes, bend a standard paperclip to effectively clear individual burner ports. After cleaning, allow the tubes to dry completely for 30-60 minutes before reassembling. Test for remaining blockages to guarantee consistent flame performance and proper preheating.
Wipe Down the Exterior Surfaces
Your grill’s exterior demands the same attention you’ve given its internal components, as surface maintenance directly impacts both longevity and performance. Start with exterior cleaning tips: remove loose debris using a soft-bristled brush, then wipe surfaces with a damp cloth. For stubborn stains, apply a degreaser like Simple Green or Formula 409, scrubbing gently with 0000 steel wool to avoid surface damage. Using nonmetallic cleaning pads helps prevent scratches and damage to your grill’s exterior finish.
Different materials require specific surface maintenance techniques. Porcelain enamel needs mild, non-abrasive cleaners, while stainless steel components benefit from dedicated stainless steel polish applied with the grain using side-to-side motions. For severe grease buildup, employ a putty scraper at a 45-degree angle or apply Weber Stubborn Stain Remover. Much like preparing for a reverse sear method, thorough cleaning ensures optimal temperature control and even heating across surfaces.
Complete the process by drying all surfaces thoroughly with a soft towel, preventing water spots and maintaining your grill’s pristine appearance. Ensure the grill is cool before beginning any cleaning to prevent burns and allow for safe handling.
[affiai keyword=”grill exterior cleaning supplies” template=”carousel” count=”3″
Empty and Replace Grease Trays
Grease tray maintenance stands as one of the most critical yet overlooked aspects of grill care, directly preventing fire hazards and guaranteeing peak performance. Always verify your grill’s completely cool before accessing the tray beneath the cook box. Slide out the tray carefully, removing any protective screen first. Empty accumulated grease and debris into a waste container using proper grease disposal methods—never pour it down drains. Use a putty knife to scrape stubborn buildup, then wash the tray with warm, soapy water. For carbonized residue, apply fine steel wool or commercial oven cleaner following safety protocols. A chimney starter method helps prevent excess grease accumulation by eliminating the need for lighter fluid. Additionally, scrape residue from heat deflectors above the grease pan to ensure complete cleaning. Replace aluminum drip pan liners after each cleaning—avoid using unauthorized materials like foil. Regular maintenance is especially important when grilling foil-wrapped potatoes at high temperatures to prevent grease flare-ups. Reinstall the cleaned tray securely with a fresh liner, confirming smooth operation before your next grilling session.
Reassemble and Perform Regular Maintenance Checks
With your grease tray properly cleaned and reinstalled, you’re ready to complete the final assembly and establish a maintenance routine that’ll keep your Weber performing like new.
Start your grill assembly by verifying all fasteners are securely tightened—check every bolt, screw, and washer. Make certain panels align correctly and the lid sits flush with its hinges. Test your ignition system and inspect gas connections for potential leaks. For a safer cleaning alternative, use aluminum foil ball to scrub grates instead of wire brushes.
Create a maintenance checklist to follow after each use: clean grill grates immediately, lubricate hinges and joints monthly, and clear flame ports seasonally. Inspect burners for even flame distribution and calibrate your thermometer regularly. Clean the exterior with mild detergent and a soft brush. Before discarding any packaging materials, check all cardboard for smaller parts that may need replacement or storage. Consider using white vinegar solution overnight to remove stubborn rust from grates.
Schedule thorough inspections quarterly, checking electrical components and applying weather-resistant coatings to metal surfaces. This systematic approach prevents costly repairs.
[affiai keyword=”grill maintenance tools and cleaning supplies” template=”carousel” count=”3″