Start by gathering wire brushes, industrial-grade degreasers, and protective gear before confirming your grill’s completely cool and disconnected from gas. Remove all components—grates, burner covers, and drip pans—then apply commercial degreaser to grates for 40 minutes. Scrub thoroughly with appropriate brushes, clean interior surfaces with soapy water, and treat the exterior with non-abrasive cleaners. Test all gas connections with soapy water for leaks, then reassemble and apply protective oil coatings to prevent oxidation. The complete process guarantees peak performance throughout your grilling season.
Gather Your Cleaning Arsenal: Tools and Products You’ll Need
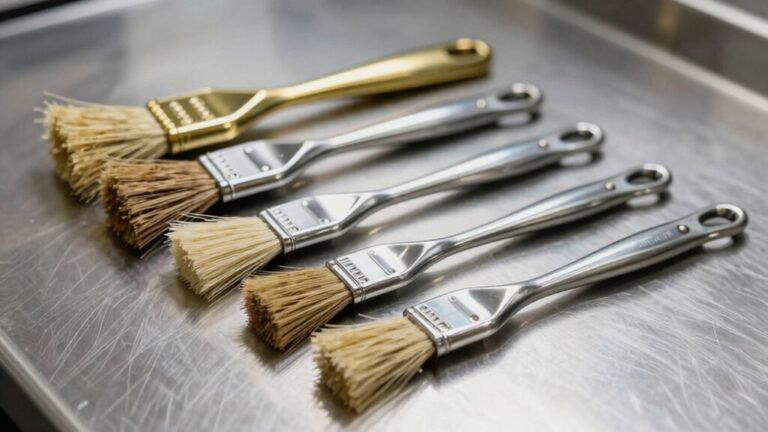
A thorough deep clean requires the right equipment—specialized tools that target grease, carbon buildup, and debris more effectively than improvised household items. Your maintenance checklist should include a high-quality grill brush (steel, brass, or bristle-free), stainless steel scraper, and poker tool for clearing burner ports. Stock essential cleaning supplies: industrial-grade degreasers like ATBBQ Grill & Oven Cleaner for carbon deposits, anti-corrosion sprays to prevent rust formation, and microfiber cloths for residue-free wiping. Don’t overlook protective gear—heavy-duty gloves shield against heat and chemicals. For charcoal units, add ash shovels and rakes to your arsenal. Look for leading brands like Broil King, Great Scrape, and GrillPro that are specifically designed to remove tough marks and stains. Consider adding natural degreasers like baking soda and vinegar as eco-friendly alternatives to chemical cleaners. A dish soap solution works effectively for soaking and loosening stubborn grime from grill grates. Organize everything in a dedicated cleaning bucket with spray bottles for solution application. This systematic approach guarantees you’re equipped for thorough grill restoration.
Prep Your Grill: Breaking Down Components for a Thorough Clean
Before you spray a single degreaser, proper grill disassembly guarantees you’ll reach every carbon-caked surface and grease-laden component. Start with grill safety: disconnect propane tanks or shut off gas supply lines completely. Systematically remove cooking grates, burner covers, drip pans, and catch trays. For charcoal units, extract the ash catcher to prevent vent blockage.
When detaching burner tubes, note their orientation—burner holes face upward, and connector tubes align with specific mounting brackets. This documentation prevents reassembly errors. Establish a designated component storage area where parts can soak without cross-contamination. Lay out removed pieces sequentially to streamline reinstallation. Consider covering your patio or deck with a dropcloth to contain the mess, as grill cleaning can scatter grease and debris across outdoor surfaces. Always wear heat-resistant gloves while handling warm grill components during cleaning.
During disassembly, inspect each part for wear indicators: cracked seals, corroded fittings, or damaged igniters. Document compromised components for immediate replacement, ensuring peak performance and safety compliance. For optimal results, preheat the grill to 500 degrees Fahrenheit before disassembly to help loosen stubborn grime and residue.
[affiai keyword=”grill cleaning tools and maintenance kit” template=”carousel” count=”3″
Tackle the Grates and Interior: Removing Built-Up Grease and Grime
With components safely removed and organized, you can now address the heaviest concentration of carbonized residue: the cooking grates and firebox interior. Apply commercial degreaser to grates, allowing 40 minutes for chemical penetration of baked-on grease layers. During this dwell time, scrape interior surfaces with plastic putty knives to remove loose char without damaging enamel coatings. For cast iron grates, use stainless steel or brass bristle brushes for aggressive grease removal, then dry immediately and apply vegetable oil seasoning. Porcelain-coated grates require gentler techniques—extended soaking followed by nylon brushes prevents surface chipping. Power washers effectively strip heavy buildup during deep cleans. Proper grate maintenance includes post-session brushing and periodic soaking cycles. For stubborn rust spots, heat the surface for 20 minutes on medium-high to make removal easier. Clean drip trays regularly to eliminate grease accumulation that causes flare-ups and performance degradation. After applying any chemical cleaning solution, rinse grates thoroughly to ensure all degreaser residue is removed before the next cooking session. Starting the cleaning process while the grill is still warm but safe helps loosen stuck-on food particles more easily.
Clean the Exterior and Inspect Key Components
Once interior components have been thoroughly cleaned and reassembled, shift your attention to the grill’s exterior surfaces and structural elements. Begin by ensuring the unit has completely cooled and gas supply is disconnected. Mix one teaspoon of mild dish soap per quart of water, then apply with a soft cloth to all exterior materials—stainless steel, porcelain-coated surfaces, and painted panels require non-abrasive cleaning techniques. For rust spots, use Barkeeper’s Friend; treat hard water stains with specialized cleaners or mild vinegar solutions. For optimal cleaning results, heat the grill to 400 degrees Fahrenheit before beginning the deep cleaning process. Rinse thoroughly and dry with lint-free cloths to prevent water spots. During this process, inspect the cart, hinges, wheels, gas lines, and control panel for wear, corrosion, or damage. When cleaning near burners, exercise caution to prevent water ingress that could damage internal components. Empty the ash catcher regularly to maintain proper airflow and even heating throughout your grill. Apply protective polish if desired, and establish a regular maintenance schedule to preserve exterior condition.
Put It All Back Together and Keep Your Grill Season-Ready
After addressing exterior surfaces and structural integrity, you’ll need to reassemble your grill’s components in proper sequence to guarantee safe, efficient operation. Position grates, burners, and drip trays into designated slots, making certain burner tubes and heat shields seat correctly to prevent gas flow disruptions. Secure all fasteners and verify component stability before proceeding.
Apply thin oil coatings to grates and cast iron surfaces to inhibit oxidation. Use stainless steel brushes while grates are still warm to remove stubborn residue effectively. For tough rust spots, soak affected areas in a vinegar salt mixture overnight before scrubbing. Season moving parts—hinges, handles, wheels—with appropriate lubricants to prevent seizure. Install a weather-resistant cover and store propane tanks in ventilated areas during extended downtime.
Execute routine maintenance checks: inspect gas connections for leaks, clear burner ports with wire brushes, and empty grease traps frequently. Use soapy water solution on connections to detect any gas leaks by watching for bubbles. These grill assembly and maintenance tips promote peak performance throughout the season while extending equipment lifespan.
[affiai keyword=”grill maintenance and cleaning supplies” template=”carousel” count=”3″