Start by disconnecting your propane tank and allowing the grill to cool completely. Remove grates and soak them in warm soapy water or a vinegar-baking soda solution overnight, then scrub thoroughly. Access burners by removing heat plates, clearing each port with a rigid tool to guarantee proper gas flow. Use plastic scrapers on interior surfaces to eliminate carbon buildup, then apply a baking soda paste for stubborn grease. Clean the exterior according to material type—stainless steel, enamel, or cast iron—using appropriate solutions. Following these extensive steps will guarantee peak performance and longevity.
Safety First: Preparing Your Grill for Cleaning
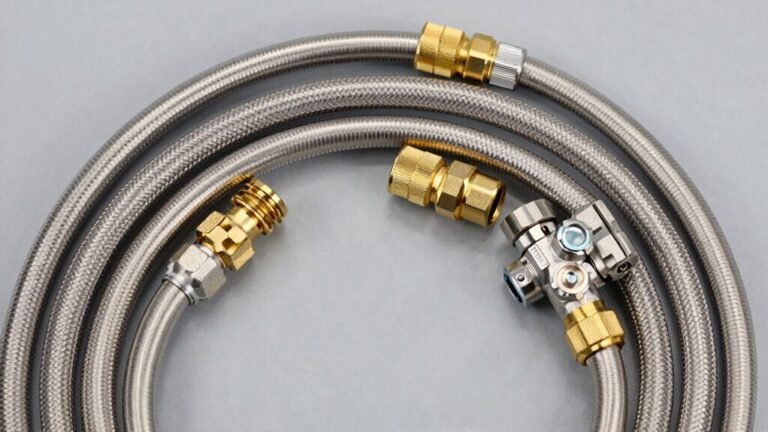
Before you begin cleaning your propane BBQ grill, you must establish a safe working environment and verify the integrity of your grill’s gas system. Essential safety tips include allowing the grill to cool completely, then turning off and disconnecting the propane tank. Apply a soap-and-water solution to all connections and hoses to check for bubbles indicating leaks. Inspect components for cracks, brittleness, or wear, replacing damaged parts immediately. Choose a well-ventilated outdoor space and keep flammable materials away from your work area. Critical cleaning precautions involve wearing heat-resistant gloves and safety glasses, positioning a fire extinguisher nearby, and removing children and pets from the area. Check burner covers and drip pans for grease accumulation before proceeding with maintenance procedures. Using non-abrasive cloths will help protect your grill’s stainless steel finish during the cleaning process. Once safety checks are complete, pre-heat grill on high for 15 minutes before turning off both the grill and gas supply. Regular cleaning while the grill is still warm but safe helps prevent stubborn buildup and makes maintenance easier.
Gathering the Right Tools and Cleaning Supplies
With your grill now properly prepared and secured, assembling the correct cleaning tools and supplies will determine how efficiently you complete the maintenance process. Your tool selection should include a quality grill brush—either wire-bristled for heavy-duty cleaning or bristle-free models to avoid metal fragment contamination. Add stainless steel scrapers for stubborn residue and angled versions for hard-to-reach areas between grates. Stock food-safe degreasers formulated to break down carbon buildup without damaging protective coatings. Effective cleaning techniques require heat-resistant gloves, microfiber cloths, and non-abrasive scrubbing pads. Consider replaceable brush heads for ongoing hygiene maintenance. For optimal cleaning results, heat your grill to 400 degrees Fahrenheit to help steam and soften stuck-on residue. For those seeking premium durability, commercial-grade grill brushes offer superior construction and extended lifespans compared to standard models. Organize these tools in a dedicated caddy, ensuring quick access while protecting against corrosion. Onion cleaning, a natural alternative, can help remove stubborn grime while adding no harmful chemicals. Proper preparation maximizes cleaning efficiency and extends your grill’s operational lifespan.
[affiai keyword=”grill cleaning tools and supplies kit” template=”carousel” count=”3″
Removing and Soaking Grill Grates
Proper grate removal forms the foundation of thorough grill maintenance and prevents costly damage to your equipment. After your grill cools completely, turn off the propane and open the lid fully. Wear heat-resistant gloves and release any securing clips before lifting grates gently from one side to avoid warping. Place them on a flat surface for treatment. Similar to nonmetallic cleaning pads, a gentle approach preserves your grill’s surfaces. Aluminum foil balls provide a safe and effective scrubbing alternative to wire brushes.
Submerge grates in a container with soaking solutions—warm water mixed with dish soap or vinegar and baking soda. Let them soak overnight to loosen stubborn residue. After soaking, scrub with a non-abrasive brush, rinse thoroughly, and dry completely to prevent rust. Follow these maintenance tips: avoid wire brushes with loose bristles, never use harsh chemicals, and apply cooking oil after drying to condition the metal. For efficient cleaning, keep the nozzle 3-6 inches away when applying concentrated dish spray to ensure even coverage.
[affiai keyword=”grill grate cleaning supplies soaking container” template=”carousel” count=”3″
Scrubbing and Restoring Grates to Like-New Condition
After soaking loosens the accumulated grime, you’ll need the right tools to restore your grates completely. Use stiff wire brushes or plastic putty knives to scrape off remaining residue, working systematically across both surfaces. Apply specialized cleaners like Bar Keeper’s Friend with abrasive pads, scrubbing extensively to remove up to 90% of baked-on buildup. For stainless steel grates, buff with appropriate cleaners following the grain to restore shine. Just as spatchcocked turkey cooks more evenly due to increased surface area, thorough grate cleaning ensures even heat distribution across your cooking surface. Regular inspection of burner ports helps prevent uneven heating and flame problems during grilling.
Post-cleaning, dry grates thoroughly to prevent rust formation. Cast iron requires grate seasoning—wipe with vegetable oil to restore protective coating. For extremely stubborn, baked-on residue, consider using a wire cup brush attachment on a drill for more aggressive cleaning power. Maintain this restoration through proper cleaning frequency: remove debris after each use and perform deep cleans seasonally. Always work in ventilated areas, wear protective gloves, and avoid wire brushes with loose bristles to prevent ingestion hazards.
[affiai keyword=”grill grate cleaning brush and scraper” template=”carousel” count=”3″
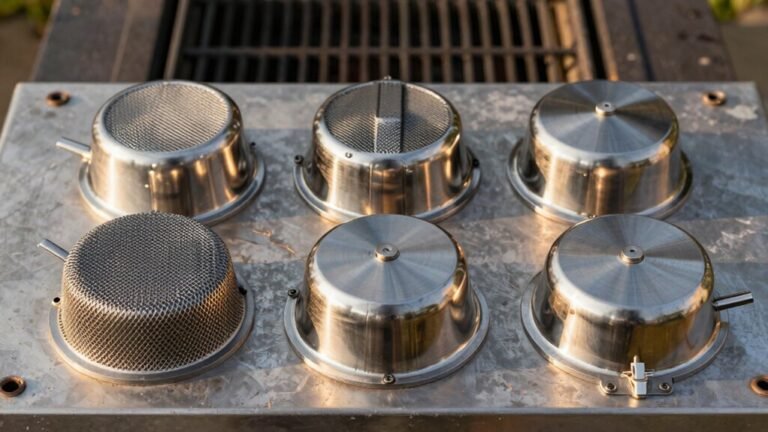
Accessing and Cleaning Burners and Gas Components
While grill grates receive most of the attention during routine maintenance, the burners and gas components directly determine your BBQ’s performance and safety. Begin by disconnecting the propane tank and allowing burners to cool completely. Remove cooking grates and flavorizer bars, then carefully extract burners after detaching any cotter pins. During burner inspection, use a rigid tool like a paperclip to clear individual ports, brushing vertically to prevent debris penetration. Clean crossover channels and shake burners vigorously to dislodge ash. Just like with Weber grill maintenance, a thorough cleaning ensures optimal heat distribution and longevity. Inspect the gas orifice with a bottle brush, avoiding aggressive tools that could damage this critical component. Clean air shutters thoroughly and verify proper gas type settings. After reassembly, test for uniform blue flames, confirming successful cleaning and safe operation. Spotty flames are a clear indicator that your burner ports have become clogged and need immediate attention. Using baking soda paste on stubborn grease deposits helps break down buildup without damaging metal components.
Deep Cleaning the Interior Surfaces
With burners and gas components restored to peak condition, the grill’s interior surfaces demand equal attention to maintain performance and prevent safety hazards. Begin by disconnecting the propane tank and ensuring complete cooling. Remove all detachable components—grates, warming racks, heat plates, and drip pans. Use a plastic scraper to eliminate carbon deposits from interior walls and lid surfaces, focusing on heavily accumulated areas. Apply a baking soda and vinegar solution to break down stubborn grease; allow five minutes for foaming action before scrubbing with non-abrasive materials. Starting with the lid prevents freshly cleaned surfaces from getting dirty as you work downward. Similar to charcoal grills, using a stiff wire brush helps remove tough debris effectively. Preheating the grill to high temperatures of 500-550°F can help loosen stubborn grime before cleaning. Rinse thoroughly with clean water and air dry with the lid open. For effective interior maintenance and grease prevention, clean every four to five uses and perform high-heat burn-offs post-cleaning to carbonize residual particles.
Maintaining the Exterior Based on Material Type
Different exterior materials require distinct maintenance approaches to preserve both appearance and structural integrity throughout your grill’s lifespan. For stainless steel care, wipe down surfaces with soapy water and a soft cloth, then rinse thoroughly and dry immediately to prevent water spots. Apply protective coating to maintain shine. Enamel maintenance demands mild dish soap with soft sponges only—never use abrasive scrubbers that compromise the coating. Porcelain-coated exteriors need gentle soap solutions and immediate inspection for chips that expose underlying metal to rust. Cast iron requires oil-based cleaning exclusively; avoid water contact entirely. Apply vegetable oil after each cleaning and re-season regularly. For tough rust spots, a gentle overnight soak in vinegar and salt can effectively loosen stubborn oxidation. Regardless of material, use microfiber cloths for streak-free drying, inspect routinely for rust formation, and apply appropriate protective treatments to maximize durability. Regular cleaning a few times per year prevents build-up and keeps your grill exterior looking its best. With proper maintenance and care, stainless steel grills can provide excellent service for up to 15 years.
Reassembling Your Grill Properly
After cleaning and protecting your grill’s exterior, proper reassembly guarantees safe operation and ideal performance. Follow these reassembly tips to avoid assembly mistakes: position panels with flanges facing inward and place the gas hose opening at bottom right. Install burners with non-screw holes facing rear, then secure with manufacturer-supplied screws. Position heat tents above burners according to specifications for even heat distribution. When securing the propane tank, confirm the bottom ring rests in bracket cutouts and attach the retaining wire over the upper ring. Route the propane hose without kinks and tighten fittings hand-tight only. Install control knobs after the panel is secured. Before use, perform a leak test using soapy water solution and verify all fasteners are tight. When reinstalling the grill lid, ensure you properly insert the cotter pins and keys to secure it in place. Maintaining a consistent 350 degree temperature is crucial for achieving perfectly smoked meats once your grill is reassembled. Always ensure your grill is placed in a well-ventilated area for safe operation.
Establishing a Regular Cleaning Schedule
A consistent cleaning schedule prevents 80% of common grill performance issues and extends your propane BBQ’s operational life by several years. Base your cleaning frequency on your specific usage patterns: casual grillers (1-2 times monthly) should perform deep cleans at season start and end, while weekly users require thorough cleaning every two months to manage grease accumulation.
After each grilling session, heat grates and scrape debris while warm. Empty drip trays regularly to prevent fire hazards. Apply light oil coatings to grates every few weeks to inhibit rust formation. For tough grease buildup, a vinegar solution mixture can effectively break down residue without harsh chemicals.
Monitor for immediate cleaning triggers: excessive smoke, persistent flare-ups, food sticking, rust formation, or pest activity. These indicators supersede scheduled maintenance and require prompt attention to maintain safe operation and peak cooking performance. When grease buildup becomes too difficult to remove on your own, professional cleaning services can provide thorough degreasing and restoration.
[affiai keyword=”grill cleaning tools and supplies” template=”carousel” count=”3″