You’ll need 30 to 45 minutes to grill chicken legs at 375°F to 400°F using a two-zone setup. Start by placing the legs over indirect heat for 25-30 minutes, then finish with 5-10 minutes of direct heat to crisp the skin. Use an instant-read thermometer to confirm they’ve reached 165°F minimum, though 185°F delivers ideal tenderness for dark meat. The precise technique involves temperature control, proper seasoning, and strategic sauce application to achieve restaurant-quality results.
Understanding Optimal Grill Temperature Settings
When grilling chicken legs, maintaining the correct temperature range of 350°F to 450°F determines whether you’ll achieve perfectly cooked meat with crispy skin or end up with burnt exteriors and raw centers. Different grill types require specific approaches: charcoal grills perform at peak efficiency at 350°F for indirect cooking, while gas grills function best at 400°F to 450°F on medium-high settings. Implement a two-zone setup to facilitate both searing over direct heat and thorough cooking via indirect heat. Use a grill thermometer to monitor temperature consistency throughout the 25-40 minute cooking process. Heat adjustment becomes critical when managing flare-ups caused by fat drips—simply relocate the chicken or reduce temperature. Similar to moderately pink center burgers requiring 30 minutes of cooking time, your target internal temperature should reach 185°F for ideal tenderness while ensuring the minimum safe temperature of 165°F. To prevent the chicken from sticking to the grill, clean and oil the grates before placing the legs on the cooking surface. Regular grill brush cleaning after each use helps prevent food residue buildup that can affect cooking performance and flavor.
Preparing Your Chicken Legs Before Grilling
Mastering your grill’s temperature range sets the foundation for success, but proper chicken preparation before grilling determines the final quality of your meal. Begin by patting chicken legs dry with paper towels to remove surface moisture, which guarantees ideal skin crisping. Explore marinade options containing garlic powder, smoked paprika, onion powder, and brown sugar, applying for 1-2 hours minimum or overnight for maximum flavor penetration. Apply seasoning both under and on the skin for complete flavor distribution. Execute proper oiling techniques by brushing legs with vegetable or olive oil using a paper towel held with tongs, preventing sticking while promoting spice adherence. Allow chicken to reach room temperature 30 minutes before grilling, guaranteeing uniform internal cooking and superior texture throughout. The internal temperature must reach 165°F for safe consumption according to food safety guidelines. For enhanced tenderness and moisture retention, consider brining the meat before applying seasonings. If you prefer a simpler approach, store-bought rubs offer a convenient alternative to custom spice blends while still delivering excellent flavor.
Cooking Time Guidelines for Different Grill Types
Successful grilling depends on understanding how your grill type affects cooking duration and heat management. Gas grills maintain consistent temperatures between 325°F and 350°F, cooking chicken legs in 45 minutes to 1 hour with predictable results. You’ll apply your preferred seasoning options before grilling, then turn legs every 5-10 minutes for even charring. Charcoal grills require advanced grilling techniques—start with direct heat for browning, then move to indirect heat zones. Smaller legs (8-10 ounces) need 6-8 minutes per side at 375-400°F, while larger ones (12-14 ounces) require 8-10 minutes per side. Always verify doneness with a digital thermometer, targeting 165°F minimum or 185°F for ideal tenderness. Temperature fluctuations demand constant monitoring regardless of grill type. For optimal results, allow drumsticks to come to room temperature before placing them on the grill to ensure even cooking throughout. For the juiciest results, let the chicken legs rest 5-10 minutes after cooking to allow the internal juices to redistribute properly. Similar to chicken thighs, consider skin side down first to achieve a deliciously crispy exterior.
The Two-Zone Grilling Method Explained
The two-zone grilling method transforms your grill into a versatile cooking station by establishing distinct temperature zones—one side radiates high direct heat while the other maintains low indirect heat. For charcoal grills, pile all hot coals on one side after they’ve reached 400-450°F. Gas grills require lighting only half the burners to medium-high while leaving others off. This two zone setup enables precision control—you’ll start chicken legs on the indirect side at 275-325°F for gradual cooking, then transfer them to the direct zone reaching 450-500°F for final searing. These grilling techniques prevent flare-ups from dripping fat and eliminate burnt exteriors with raw interiors. Similar to Old Bay seasoning on grilled catfish, proper seasoning is essential for flavorful results. For perfectly tender and safe results, cook until legs reach an internal temp 170F before moving to the hot zone. Monitor both zones with a reliable thermometer to maintain consistent temperatures throughout the cooking process. After removing chicken legs from the grill, let them rest for 10-15 minutes to allow juices to redistribute and enhance both flavor and tenderness.
Achieving the Right Internal Temperature
Precision temperature control separates perfectly grilled chicken legs from rubbery, undercooked meat. While the FDA mandates 165°F as the minimum safe internal temperature for poultry, this baseline won’t deliver ideal results for dark meat cuts. You’ll achieve superior texture and flavor by targeting 170-185°F, which allows proper connective tissue breakdown.
At 165°F, chicken legs remain safe but tough, as collagen hasn’t fully converted to gelatin. Reaching 185°F transforms stringy fibers into succulent, fork-tender meat with enhanced juiciness. Even cooking to up to 195°F can still produce moist and tender drumsticks without drying out the meat. Just as stainless steel grates provide optimal grilling performance, proper temperature control ensures consistently excellent results. Similar to smoking wings at 225-250°F range, low and slow cooking helps develop deeper flavors before finishing at higher heat. Use a reliable instant-read thermometer inserted into the thickest part of the leg, avoiding bone contact for accurate readings.
Temperature monitoring isn’t optional—it’s essential. Cooking times vary based on grill heat, chicken size, and starting temperature, making visual cues unreliable indicators of doneness.
Essential Techniques for Crispy Skin and Juicy Meat
Reaching proper internal temperature guarantees food safety, but texture and presentation depend entirely on how you manage moisture and heat during grilling. Pat chicken legs dry with paper towels, then refrigerate exposed for at least 2 hours—this essential skin preparation step eliminates surface moisture that causes steaming. Apply baking powder mixed with salt as a dry brine to draw out additional moisture while enhancing browning through alkaline reactions. Start cooking over indirect heat at 400–425°F, then finish with direct heat for maximum crisp. Turn drumsticks every 5–10 minutes for even browning. Setting up a two-zone fire helps control cooking speed and prevents flare-ups that can burn the skin. Season liberally under and on the skin using your preferred spice blend—these seasoning techniques penetrate deeply without compromising crispness. Consider spraying with apple cider mixture during cooking to maintain moisture and add flavor. Oil grill grates thoroughly to prevent sticking and promote golden-brown, blistered skin. Use an instant-read thermometer to verify the chicken reaches 180-185°F internal temperature for optimal tenderness and safety.
When and How to Apply BBQ Sauce
When grilling chicken legs, timing your BBQ sauce application separates mediocre results from restaurant-quality glaze. Apply sauce only after the internal temperature reaches 130–140°F—typically during the final 20 minutes of cooking. This prevents sugar-laden sauce from burning while allowing proper caramelization.
Your basting technique requires precision: use a food-safe brush to coat all surfaces, rotating legs every 1–2 minutes over indirect or medium-low heat. Similar to making tender ribs, maintaining a controlled low temperature helps prevent the meat from drying out. Apply warm sauce in thin, even layers rather than drowning the meat. Close the lid between rotations to set the glaze without drying. For optimal tenderness, consider smoking at 225°F before finishing with sauce at higher heat.
Reserve some sauce for table service, and monitor closely—sugars caramelize rapidly. Remove chicken promptly at 165°F internal temperature. Never sauce at the start; patience yields superior texture and flavor. Allowing the chicken to rest before serving helps lock in the juices for maximum tenderness.
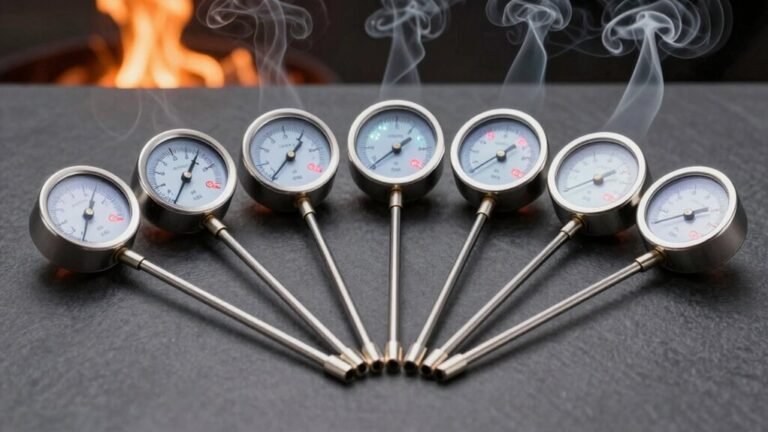
Using a Meat Thermometer Correctly
A single degree separates perfectly cooked chicken from potential food safety risks, making your meat thermometer technique non-negotiable. Insert the probe into the thickest part of the leg, avoiding bones and tendons that compromise accurate readings. Different thermometer types offer varying benefits—instant-read digital models deliver quick, precise measurements, while leave-in probes monitor temperatures continuously. Just as with indirect heat grilling of mushrooms, proper temperature control is essential for perfectly cooked results.
Position the probe horizontally through the meat’s center, ensuring it doesn’t contact bone or fat. Calibrate your thermometer regularly to maintain measurement accuracy. Check multiple legs if they vary in thickness, as inconsistent sizing affects cooking times. Similar to cooking bone-in breasts, a moderate heat of 300-400°F promotes even cooking and juicy results. You’re targeting 165°F minimum for food safety, though 170-175°F yields peak tenderness in dark meat. Insert the thermometer about an inch into the chicken leg to ensure an accurate reading without false temperatures. Verify temperatures consistently throughout the cooking process to prevent both undercooking and dryness from excessive heat exposure.
Resting and Serving Your Grilled Chicken Legs
Once your chicken legs reach 165-175°F, immediately transfer them to a clean platter and resist the urge to serve. Proper rest duration is critical—allow 5 to 10 minutes for juice redistribution and carryover cooking. Loosely tent with foil to retain heat without steaming the skin, which compromises crispness. This resting period stabilizes internal temperature and breaks down connective tissues for enhanced tenderness. Just as with boneless chicken breasts, using an instant-read thermometer ensures precise doneness verification. Similar to the low and slow approach used in smoking brisket, patience during the resting phase yields superior results.
For ideal serving techniques, arrange drumsticks on a preheated platter with spacing to maintain texture. Garnish with fresh herbs or citrus for brightness. Position sauces in separate ramekins rather than pouring directly over legs to preserve crispy skin. Pair with complementary sides like grilled vegetables or coleslaw. While the USDA minimum is 165°F, resting allows the chicken to reach optimal tenderness at 185°F through carryover cooking. These professional practices guarantee you deliver perfectly rested, flavorful chicken legs.
Storing and Reheating Leftover Grilled Chicken
Proper storage transforms leftover grilled chicken legs from potential food safety hazards into convenient meal components for days ahead. Follow FDA refrigeration guidelines: refrigerate within two hours at or below 40°F (4°C) for 3–4 days maximum. Cool chicken to room temperature, then store in airtight containers labeled with dates to track freshness. USDA guidelines recommend storing all types of cooked chicken using these same safety principles. Thaw frozen chicken in the safe thawing methods like refrigerator, cold water bath, or microwave.
For extended preservation, employ proper freezing techniques. Freeze fully cooled chicken in meal-sized portions using freezer bags or airtight containers for up to 4 months. Never refreeze thawed chicken without thorough reheating first.
When reheating, achieve a minimum internal temperature of 165°F (74°C). Use oven (350°F) or skillet methods for ideal moisture retention. The stovetop method works particularly well for adding oil and broth to maintain moisture in the meat. Discard chicken showing mold, sliminess, or sour odors—these indicate spoilage and potential foodborne illness.