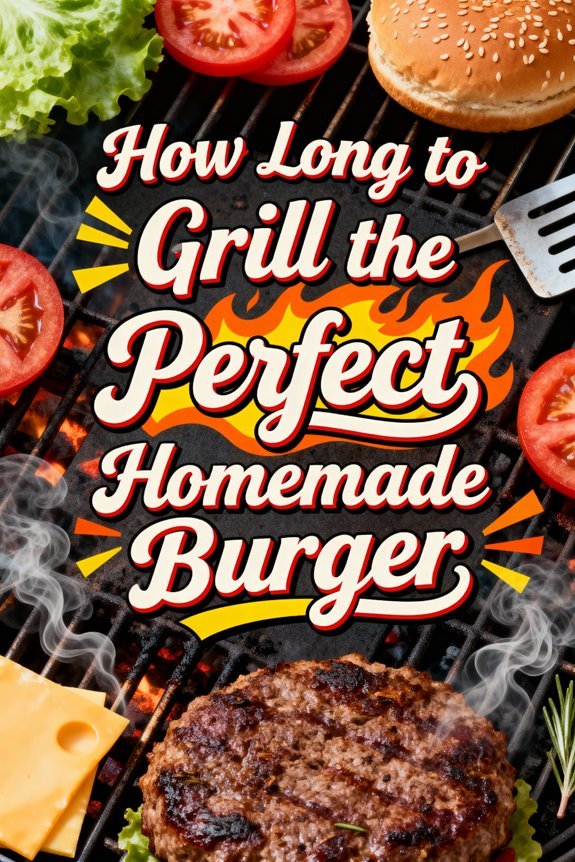
You’ll need to grill your homemade burgers for 4 to 10 minutes per side, depending on patty thickness and desired doneness. For a standard ¾-inch patty, aim for 5 minutes per side to reach the USDA-recommended 160°F internal temperature. Flip only once when juices pool on the surface after 3-4 minutes, and always use an instant-read thermometer inserted horizontally for accuracy. Pull your burgers 5-10°F below target temp to account for carryover cooking. The sections below cover essential preparation techniques and temperature control methods.
Understanding Burger Doneness Levels and Internal Temperatures
When grilling burgers, understanding the relationship between doneness levels and internal temperatures forms the foundation of consistent results. Rare burgers reach 120-125°F with cool, red centers, while medium rare achieves 130-135°F with warm, red interiors. Medium burgers hit 140-145°F, displaying pink centers with balanced juiciness. Medium well ranges from 150-155°F, showing minimal pink, and well-done reaches 160°F minimum—the USDA-recommended standard for burger safety. The texture differences between levels are significant: rare remains very soft, medium-rare offers slight springiness, medium provides firm yet juicy consistency, and well-done delivers maximum firmness. Each 10-degree temperature increase reduces moisture content while intensifying textural firmness. Much like low and slow smoking methods for ribs, precise temperature control is crucial for achieving the perfect burger. Creating a center indentation in each patty helps prevent unwanted puffing during cooking. Use an instant-read thermometer inserted into the burger’s center for accurate measurements, ensuring you achieve your desired doneness while maintaining proper food safety standards. Remember that carryover cooking will raise the internal temperature slightly after removing burgers from heat, so plan accordingly.
Grilling Time Chart by Thickness and Desired Doneness
Three primary factors determine accurate grilling times: patty thickness, target internal temperature, and grill surface heat. For 1/4-inch thin patties on high heat (400-450°F), you’ll need 4 minutes per side for rare (120-125°F), progressing to 8-9 minutes per side for well-done (160°F). Medium 3/4-inch patties require an additional minute per doneness level at medium-high heat (350-400°F). Thick 1-inch patties demand medium heat with 6 minutes per side for rare, extending to 10 minutes for well-done. Burger thickness directly impacts cooking time—each quarter-inch increase adds approximately 1-2 minutes per side. Always verify doneness with a meat thermometer inserted horizontally into the patty’s center, accounting for 5-10°F carryover cooking during the 3-5 minute rest period. Insert the thermometer tip into the thickest part of the burger to ensure the most accurate reading. For indoor cooking convenience, a George Foreman Grill can achieve similar results in just 4-7 minutes total with the lid closed. Similar to making a perfect grilled cheese, using low and slow heat helps ensure even cooking without burning the exterior.
Preparing Your Patties for Optimal Cooking Results
Before your burger touches the grill grates, you’ll need to master the foundational techniques that transform ground beef into a perfectly formed patty. Start with 80/20 ground beef for maximum fat content. Bind your mixture with crushed crackers or panko breadcrumbs to control patty moisture retention. Season with salt, pepper, garlic powder, and Worcestershire sauce as your base, then explore seasoning variations like cumin, red pepper flakes, or dried herbs such as sage and thyme. For optimal results, preheat your grill to 375 degrees Fahrenheit before cooking begins. Unlike frozen patties, which require two-zone grilling, fresh burgers cook best over consistent direct heat.
Form patties slightly larger than your bun to account for shrinkage, maintaining uniform thickness throughout. Create a shallow dimple in each patty’s center to prevent bulging during cooking. Refrigerate formed patties for one hour minimum to guarantee structural integrity. Mix in chopped onion to add moisture and enhance the overall flavor profile. Separate layers with parchment paper if stacking, and handle gently to avoid compacting the meat.
Essential Tools for Monitoring Burger Temperature
While visual cues and touch tests have their place in grilling, precise temperature monitoring remains the definitive method for achieving consistent burger doneness and ensuring food safety. You’ll need a reliable meat thermometer—preferably an instant-read digital model with thermometer accuracy of ±0.5°F or better. The Thermapen ONE delivers readings in under one second, while wireless connectivity options like ThermoPro models allow remote monitoring without lifting the grill lid. Just as cooking temperature of 225°F is crucial for smoking eggs to perfection, regularly cleaning your grates helps ensure accurate temperature readings and better overall grilling results.
Insert your probe horizontally into the burger’s side, targeting the center while avoiding contact with the grate. For multi-patty cooking sessions, consider thermometers with multi-probe capabilities to monitor several burgers simultaneously. The ThermoPro Wireless Digital Meat Thermometer features a hands-free monitoring system that sends temperature readings to a separate monitor, eliminating the need to constantly check your burgers. Professional-grade options from ThermoWorks offer waterproof construction and advanced features that withstand high-heat grilling environments, ensuring precise measurements every time.
Setting Up Your Grill for Perfect Heat Control
Armed with an accurate thermometer, you’re ready to configure your grill’s heat zones for controlled cooking. Preheat your grill for 15 minutes, targeting 450–500°F on the direct heat side. For charcoal grills, wait until coals develop a white ash coating, then arrange them for two-zone cooking—stacked for high heat, spread thinly for indirect. Gas grill users should fire one side to high while keeping the opposite burner low or off.
Clean grates with a stainless steel brush to guarantee proper heat transfer and prevent sticking. Monitor grill temperature using surface thermometers, adjusting charcoal vents to control oxygen flow. When fat drips cause a flare up, immediately move burgers to the indirect zone and close the lid to extinguish flames quickly while maintaining consistent cooking conditions. For smash burgers, set your griddle to 425–450°F for optimal cooking to achieve that signature crispy crust. Keep the bottom damper fully open while using the top vent to fine-tune your desired cooking temperature. For perfect doneness, grill each side for 4 to 5 minutes until internal temperature reaches 160°F.
Step-by-Step Grilling Process to Lock in Juices
Once your grill reaches 450–500°F, oil the grates lightly with a high-smoke-point fat using tongs and a folded paper towel to create a non-stick surface. Similar to achieving perfect wings, monitoring grill temperature is crucial for consistent results. Place your patties on the grates and don’t move them for 3-4 minutes to achieve a juicy sear. This initial contact develops a crust that locks in moisture while maximizing heat retention. Just as with indirect heat cooking for chicken thighs, proper temperature control prevents burning while ensuring thorough cooking. Flip once using a spatula—never press down, as this releases valuable juices. Cook the second side for 3-4 minutes, adjusting based on your target doneness. Insert a meat thermometer horizontally into the patty’s center to verify internal temperature. Remove burgers at 5°F below your desired final temperature, as carryover cooking continues. Rest patties for 2-3 minutes before serving. Simple seasonings like salt and pepper enhance the beef’s natural flavor without overpowering it.
When to Flip and How to Avoid Common Mistakes
Knowing exactly when to flip your burger separates amateur grillers from those who consistently produce restaurant-quality results. Execute the first flip after 3-4 minutes at 375-400°F when juices pool on the surface and edges begin browning. These visual indicators confirm proper crust formation. Similar to thick steel smokers, maintaining consistent temperature is crucial for even cooking results. Limit flipping techniques to once or twice maximum—excessive manipulation compromises burger moisture and structural integrity.
Avoid pressing patties with your spatula, as this extracts flavorful juices. Insert your thermometer horizontally through the side into the thickest section for accurate readings. Pull burgers 5-10°F below target temperature, accounting for carryover cooking during the mandatory 5-minute rest period. For food safety, ensure burgers reach 160 degrees Fahrenheit when cooking well-done. The patty should release cleanly when lifted, demonstrating adequate sear development and preventing surface tearing. Starting with high-quality ground beef ensures better texture and flavor throughout the cooking process.
Adding Cheese and Toppings at the Right Moment
While perfect grill marks and ideal internal temperature matter greatly, cheese application timing determines whether you’ll serve a cohesive, photogenic burger or a messy patty with hardened cheese edges. Add cheese during the last 30 seconds to 1 minute of grilling, immediately after the second side cooks mostly through. Close the grill lid or cover individual patties with a dome to trap steam—this accelerates melting without overcooking. Different cheese types require varying melt times: American melts fastest with consistent results, fresh mozzarella needs approximately 1 minute 45 seconds, and Brie requires 1 minute 15 seconds. Never flip after adding cheese. For enhanced flavor, consider mixing different cheeses like American and white cheddar to elevate both taste and texture. Just as with a medium-rare steak, using a meat thermometer ensures precise doneness every time. Reserve wet toppings like lettuce, tomato, and pickles until after you’ve removed the burger from heat to prevent wilting and maintain proper cheese adhesion.
Resting Your Burgers for Maximum Flavor
After assembling your burger with properly melted cheese and waiting to add wet toppings, you’ll need to resist the immediate temptation to serve. Rest your burgers for 3 to 5 minutes on a clean plate, loosely tented with foil. This critical step delivers substantial resting benefits: muscle fibers relax and reabsorb expelled juices, while carryover cooking finishes the patty without direct heat exposure.
The resting period enables moisture retention through juice redistribution from the hot center to the cooler exterior, preventing drip loss when you bite into the burger. Thicker patties require the full 5-minute rest, while thin patties need only 2 to 3 minutes. For oven-baked burgers, place them on a baking rack setup to ensure even cooking and proper fat drainage. The low and slow method at 225°F can create an exceptionally juicy burger when smoked for 60-90 minutes. Utilize this time to prepare buns and toppings, ensuring ideal serving temperature without sacrificing texture or juiciness. When grilling, ensure your burgers have reached 160°F internal temperature before removing them from the heat.
Troubleshooting Uneven Cooking and Dry Burgers
Even with proper grilling technique, you’ll encounter two primary challenges: uneven cooking and dry burgers. Address uneven cooking through proper patty formation—shape uniform portions loosely without excessive pressure, ensuring consistent thickness across all burgers. Maintain grill temperature at 400-450°F for even heat distribution. Implement a disciplined flipping strategy: turn burgers only two to three times to preserve the sear and prevent heat loss. Similar to grilling steaks, room temperature preparation helps ensure even cooking throughout the burger. Like grilling frozen chicken, internal temperature monitoring is critical for food safety and optimal results.
Dry burgers result from overcooking, insufficient fat content, or excessive handling. Select 80/20 ground beef for peak moisture retention. Cook to precise internal temperatures—160°F for medium—using a thermometer rather than guesswork. Achieve a proper sear within the first two minutes to lock in juices. Store patties refrigerated until grilling, and minimize handling during cooking to prevent juice extraction. Let burgers rest for a few minutes after removing from the grill to allow juices to redistribute throughout the meat.