Fill your hopper with dry, high-quality wood pellets and guarantee all components—grates, heat baffle, and grease pan—are properly installed. Flip the power switch to ON, set your desired temperature, and close the lid for peak combustion efficiency. The hot rod will ignite pellets within 2–5 minutes, producing whitish-gray smoke as confirmation. Wait 10–15 minutes for the grill to reach target temperature before adding food. Master these fundamentals and you’ll access advanced techniques that eliminate 95% of common startup failures.
Essential Prep Steps Before Your First Fire
Preparation—that critical phase between unpacking your Traeger and tasting your first smoke-kissed meal—determines whether you’ll enjoy years of trouble-free grilling or face frustrating malfunctions. Begin with auger inspection: examine the tube for foreign objects that could jam the feed system. Next, focus on hopper filling using exclusively Traeger-brand hardwood pellets; aftermarket alternatives risk voiding your warranty and damaging components. Remove the porcelain grates, grease drain pan, and heat baffle to access the firepot. Prime the auger by powering the unit and observing pellet movement—you’ll see them dropping into the firepot, confirming proper operation. Many grillers prefer hardwood pellets like oak or hickory for their rich, smoky flavor profile. Starting on low temperature mode helps achieve optimal ignition and consistent heat distribution. Reinstall all interior components with the grease pan notch aligned toward the bucket. This one-time initial firing is essential before cooking your first batch of food and ensures optimal performance of your grill. Connect to a grounded outlet only after confirming the power switch reads OFF.
Understanding Your Grill’s Controller Type
Three distinct controller technologies power Traeger’s pellet grill lineup, each delivering different levels of temperature precision and user interaction. ARC controllers feature button-style interfaces with five-degree temperature increments and blue digital displays, fitting models like Bronson and Ranger. Pro-style dial controllers offer simpler adjustment with broader temperature ranges but less precision. Digital Pro Controllers utilize Advanced Grilling Logic technology, maintaining temperatures within ±15°F for consistent cooking performance. Elite Digital Controllers upgrade older models with orange LED displays and auto shut-down cycles. Understanding controller compatibility guarantees proper replacement or upgrade options for your specific grill model. Each controller type offers distinct controller benefits—ARC provides precision, Pro-style delivers simplicity, and Digital Pro/Elite systems deliver enhanced temperature stability vital for long smoking sessions. ARC controllers include Keep Warm Mode for maintaining food at serving temperature until ready to eat. For perfect burger grilling, these controllers can maintain the ideal grill temperature of 375°F needed for juicy, flavorful results. The digital control system works in tandem with the auger feed system to precisely deliver hardwood pellets to the fire pot for optimal heat control.
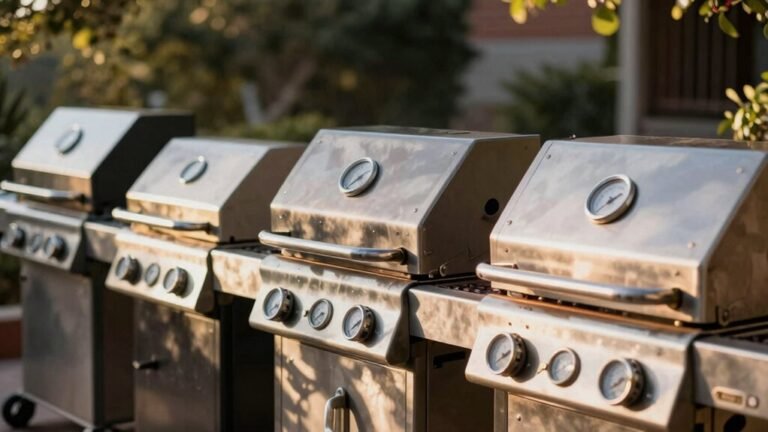
The Closed-Lid Startup Method
The closed-lid startup method represents the manufacturer-recommended ignition protocol for Traeger pellet grills, combining safety with ideal combustion efficiency. Once you’ve verified pellet availability in the hopper and confirmed proper installation of the heat baffle, drip tray, and grill grates, close the lid completely before initiating the startup sequence. With the lid position secured, flip the power switch to ON and set your desired temperature. The hotrod will activate for approximately 5 minutes, igniting pellets within 2 minutes. You’ll observe whitish-gray smoke emerging as combustion begins. The ignition time culminates when your grill reaches the target temperature within 15 minutes. During preheating, you may receive a Preheat Complete message when the grill reaches within 5°F of your set temperature. Maintaining a consistent indirect heat setup ensures even cooking results similar to traditional smokers. Wait 10 minutes before placing food to guarantee stable heat distribution and best grilling conditions. This setup allows for two-zone cooking whether you’re grilling thawed or frozen steaks to perfection.
The Open-Lid Startup Method
While the closed-lid method serves most grilling scenarios, certain conditions demand an alternative approach that prioritizes airflow and visual confirmation. Open-lid startup provides deliberate control over combustion initiation by maintaining maximum ventilation throughout the ignition sequence. Begin by filling your hopper with quality wood pellets and verifying that the heat baffle, drip tray, and grill grates sit properly in position. Before plugging in your grill, ensure the power switch is off to maintain safe startup procedures. Similar to the Camp Chef Woodwind series, proper ventilation is crucial for optimal performance and smoke flavor. Set your temperature dial to SMOKE with the lid fully open. You’ll hear the fan motor engage, followed by the distinctive “jet engine” sound within 4–5 minutes as pellets ignite. The open lid benefits include preventing overheating while enabling direct observation of flame establishment. Pellet quality directly impacts ignition reliability—premium fuel guarantees consistent combustion. Once fire stabilizes, maintain the open position for 5–10 additional minutes before closing and adjusting to your target temperature. For perfect results when grilling vegetables like zucchini, aim for a medium-high heat setting of 375-400°F.
Starting WiFIRE-Enabled Traeger Models
WiFIRE-enabled Traeger grills transform traditional pellet grill operation into a connected cooking experience, yet the startup sequence still demands hands-on interaction at the control panel despite remote capabilities. You’ll need to locate the power switch on your D2 WiFIRE grill’s rear panel and flip it to the “on” position. Download the WiFIRE mobile app to your iOS or Android device, then connect your grill to your home network during initial setup. While WiFIRE features enable remote temperature adjustments and monitoring, you cannot ignite the grill through the mobile app. You must physically set the desired temperature using the control panel and initiate the ignition sequence. WiFIRE-enabled models use a closed-lid startup method, eliminating the need to monitor ignition with the lid open. Once ignited, the app provides complete temperature control and performance monitoring from anywhere. Similar to grilling frozen chicken, maintaining proper temperature control is essential for safe and effective cooking on your Traeger grill. For optimal smoking results, maintain temperatures between 225 to 275°F when smoking meats like chicken drumsticks.
Common Startup Mistakes and How to Avoid Them
Even the most advanced WiFIRE technology won’t compensate for fundamental startup errors that plague both novice and experienced Traeger owners. New grill owners frequently skip the mandatory seasoning process**, exposing their unit to accelerated rust formation and transferring manufacturing residues directly onto their first meal. The 45-minute seasoning cycle at high heat isn’t optional—it develops the protective layer essential for non-stick performance. Natural cleaning solutions help maintain this protective layer during regular maintenance. Setting your grill to 350 degrees** provides an ideal temperature for most smoking tasks.
Auger priming failures cause erratic temperatures and no-start conditions. You’ll encounter airflow issues if you close the lid immediately after ignition; maintain a 4–5 minute open-lid period during startup. Low-quality or damp pellets create combustion problems and auger jams. Before each cook, verify your draft induction fan operates properly and the hot rod reaches ignition temperature. Wet pellets are a common cause of auger jams, as they expand and clog the feeding mechanism, preventing proper pellet delivery to the fire pot. These preventive checks eliminate 90% of startup failures.
[affiai keyword=”wood pellet grill startup accessories” template=”carousel” count=”3″
Troubleshooting Ignition and Temperature Problems
When your Traeger fails to ignite or displays erratic temperature readings, you’re facing one of five mechanical failures that account for 95% of all startup issues. The firepot won’t light if pellets don’t reach it, the hot rod doesn’t generate heat, or the induction fan fails to supply oxygen—each component must function in precise sequence. Just like seasoning a smoker, proper maintenance helps prevent ignition issues. Similar to using a chimney starter for traditional charcoal grills, following the correct startup sequence ensures reliable ignition every time.
Begin ignition troubleshooting by verifying pellet quality—wet or crumbly pellets jam augers and prevent proper feed. Check that your hot rod glows red within three minutes; ash buildup insulates the element and requires immediate cleaning. Confirm the auger cycles every 15 seconds and pellets drop into the firepot. Verify your induction fan spins freely without obstruction. For temperature stabilizing issues, inspect RTD probe connections—loose wires or “ER2” codes indicate probe failure requiring replacement. Before inspecting internal components, always turn the power switch OFF and unplug the power cord to prevent electrical hazards.
[affiai keyword=”Traeger grill ignition replacement parts” template=”carousel” count=”3″
Maintenance Tips for Reliable Starts Every Time
Preventive maintenance eliminates 80% of startup failures before they occur—converting reactive troubleshooting into systematic upkeep that guarantees ignition performance. Your grill maintenance protocol should include vacuuming ash and sawdust from the firepot and hopper every 2-3 cooks, preventing combustion failures caused by debris accumulation. Clean the drip tray and grease chute after each use to eliminate flare-up risks that compromise ignition cycles. Seasonal deep cleaning is essential for optimal grilling performance throughout summer. Similar to smoking chicken quarters at low and slow temperatures, proper maintenance ensures consistent heat control and reliable performance.
Empty your pellet hopper before thorough cleanings, removing sawdust that creates feeding blockages. Inspect heat baffles and ash caps quarterly, replacing warped components immediately. Consistent cleaning of the firepot ensures unobstructed airflow for pellet combustion. Use shop vacuums for ash removal and non-metallic brushes on grates to preserve surfaces. Clean thermocouple sensors only when visible buildup appears—maintaining temperature accuracy that’s critical for reliable starts. Perform a complete grill shutdown and allow the unit to cool before removing grates, drip tray, grease chute, and ash cap for comprehensive maintenance.
[affiai keyword=”pellet grill cleaning and maintenance tools” template=”carousel” count=”3″